Update pit limit
Pit limits define the spatial boundaries within which mining activities can occur. Keeping these limits current is essential for ensuring that activity areas are created and scheduled within approved boundaries. Pit limits also assign the activity areas that occur within them to a pit within the site.
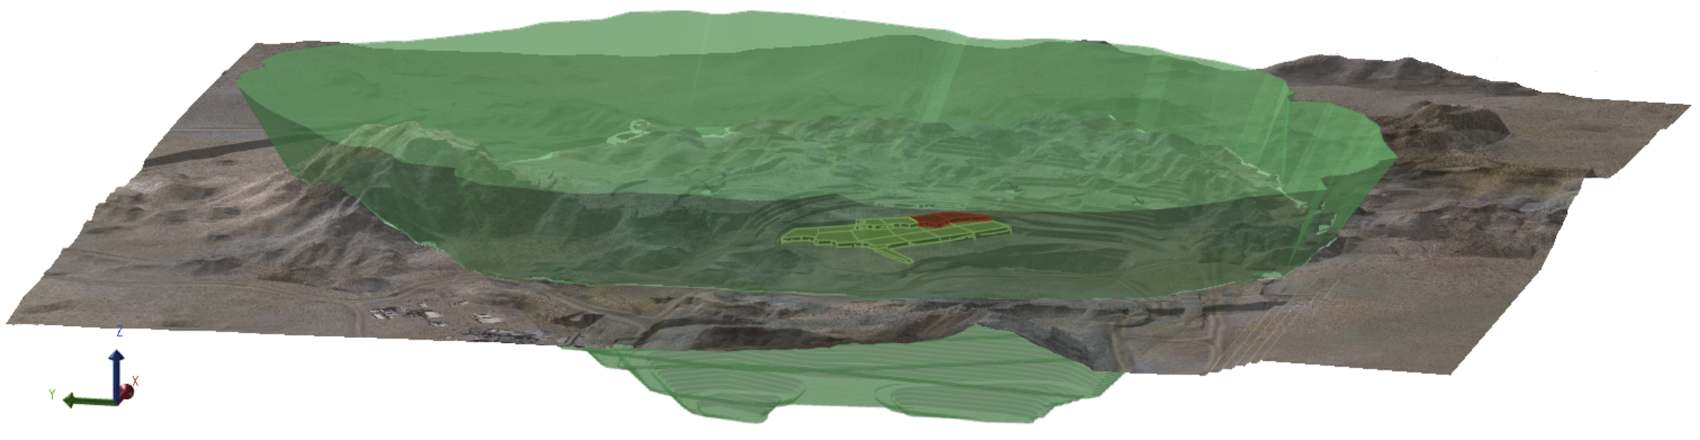
A site’s pit limit. Activity areas must be designed within this boundary.
If pit limits are missing or outdated, you risk scheduling work outside the intended mining envelope.
What is a pit limit?
Pit limits are triangulated solids that represents the maximum extents of a pit. They act as a hard boundary for mining operations and is used in conjunction with the topography to control where activity areas can be drawn and scheduled.
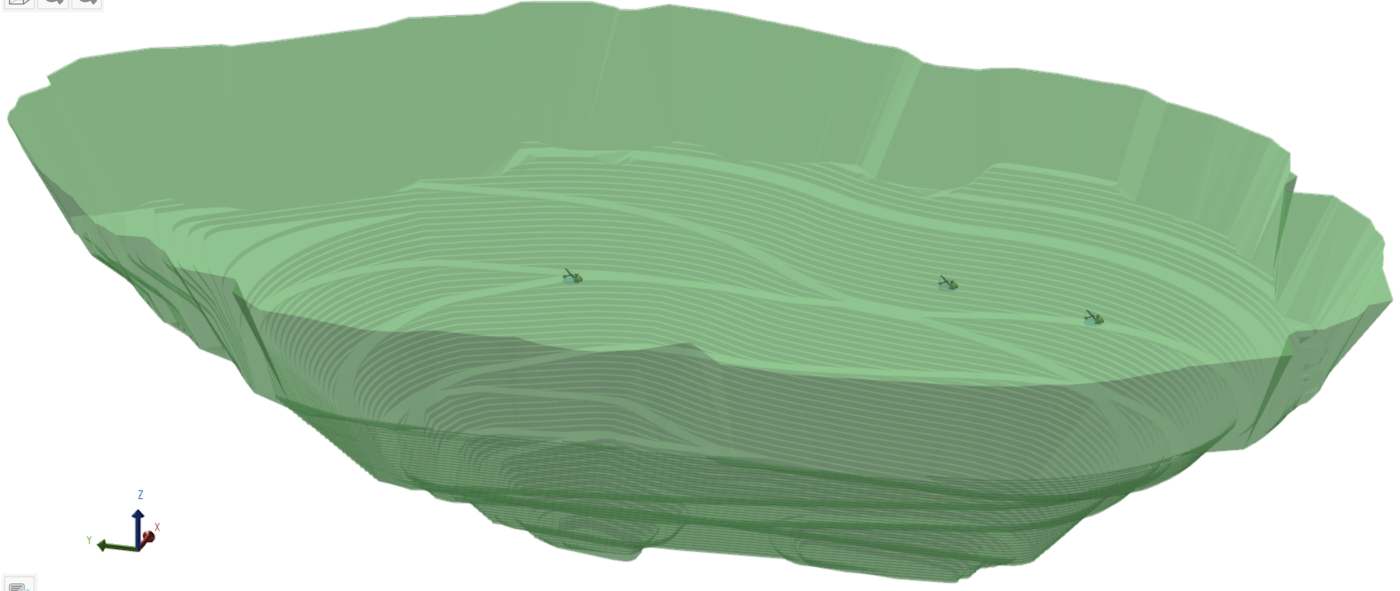
The pit solid used in the above example
Pit limits are particularly important in multi-pit operations because they determine which pit an activity area belongs to and prevent overlap between pits.
While the topography controls an activity area’s roof geometry, the pit limits define the permitted XY extents on each mining level. In this example, the activity areas are designed from the topography and within the pit boundary.
To ensure the pit’s working space is entirely captured, the pit limit should extend above the topography and slightly beyond the intended pit walls.
When to update pit limits
Unlike other tasks for updating the mining face, updating the pit limit is usually an infrequent task – as the intended pit design typically doesn’t change often or at all. However, you should update pit limits whenever there is a change to the pit design or operational constraints. Common scenarios include:
-
Approval of a new pit shell or pushback design.
-
Addition of a new pit or modification of an existing pit.
-
Changes in regulatory or operational requirements that affect pit geometry.
Where to configure pit limits
To configure a site’s pit limits, go to
Config > Site Management > Edit Site ![]() > Topographies, Aerials and Pit Limits
> Topographies, Aerials and Pit Limits ![]() .
.
Assigning activity areas to pits
A pit limit must be linked to a pit node, which is a material flow diagram location that represents a pit. This mapping ensures that any activity area drawn within a pit limit is automatically assigned to the correct pit. Without this association, the software cannot distinguish which pit an activity area belongs to, which affects both scheduling and reporting.
The software needs this mapping to differentiate activity areas across multiple pits and maintain logical scheduling. For example, when reporting production by pit, the software relies on this mapping to group activity areas correctly.
Multiple pit limits
A site can contain more than one pit limit. These may represent:
-
Separate pits within the same site, each with its own boundary.
A pit limit associates with the same spatial domain as the pit node. In this case, different pit limits can belong to different spatial domains.
-
Pushbacks within a single pit, where each pushback is represented by a separate pit limit. In this case, each pit node on the material flow diagram corresponds to a pushback, and together they form the full pit design.

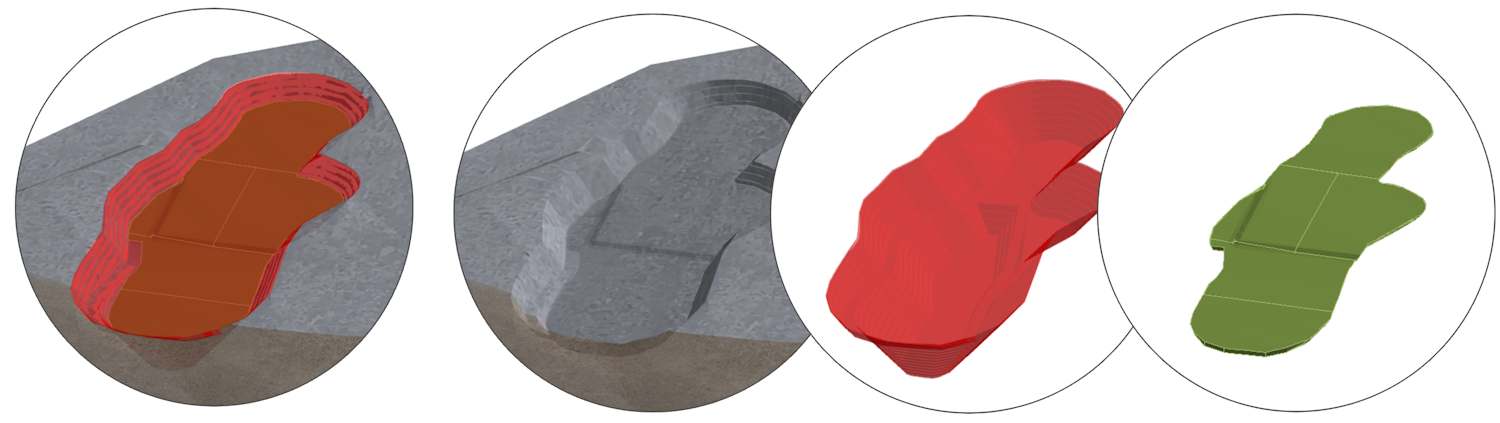
A site with two limits. Each one sets the boundary of an individual pit.
Priority
When a site has overlapping pit limits, assigning a priority to each limit is essential. Overlaps can occur when staged designs share common ground. In these cases, the software uses the priority setting to determine which pit limit takes precedence.
Activity areas that fall within an overlapping region are assigned to the pit limit with the higher priority.
Where do pit limits come from?
Pit limits are typically created during the pit design process in mine planning software such as Vulcan, Surpac, or MinePlanner’s Pit Design component. They are usually derived from ultimate pit shells or pushback designs and exported as triangulated surfaces or solids. Supported formats include:
-
Triangulated surfaces: *.dxf, *.dtm, *.tr5, *.rpmx, *.stl, *.glb
-
Grids: *.grd, *.map, *.dat
-
Other: *.wkt, *.gltf
When preparing a pit limit for XECUTE, ensure that the solid is closed, extends above the topography, and doesn’t intersect with other pits.
What happens when pit limits change?
Pit limits directly influence how activity areas are created and scheduled:
-
If you attempt to draw an activity area completely outside all pit limits, the software will prevent it.
-
If an activity area intersects a pit limit boundary, only the portion inside the limit is valid.
-
Activity areas are assigned to pits based on the pit limit they fall within. If multiple pit limits overlap, the software uses priority settings to determine which limit applies.
This behaviour ensures that all scheduled work remains within approved boundaries and that resource allocation respects pit-level constraints.
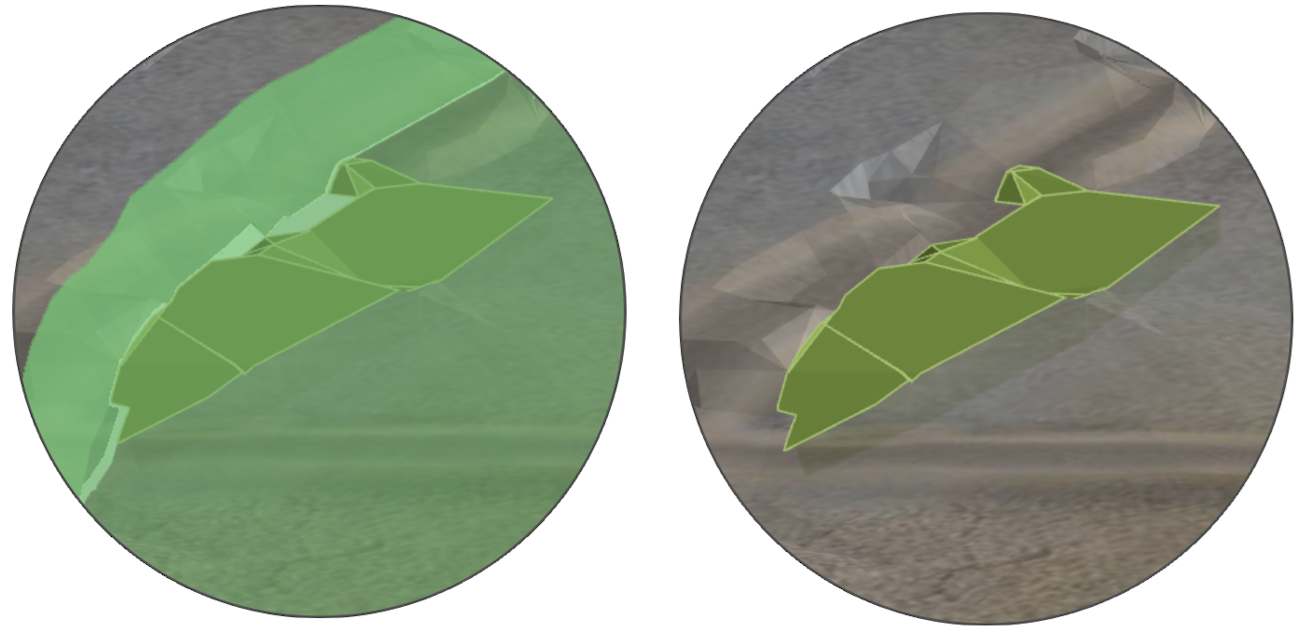
Activity areas on the boundary of the pit limit
How to update pit limits
-
Go to Config > Site Edit
 > Topographies, Aerials and Pit Limits > Pit Limit File(s).
 -
Click Remove
 on any existing pit limits that will be replaced.
 -
Click Add
 to define a pit limit profile.
 -
Within the new row, click Pit Limit File
 . Navigate to and select a pit limit file.
 -
Repeat for any additional pit limits.
-
Set the Priority (if multiple pit limits exist).
If the site contains multiple pit limits, use the Up and Down arrows to adjust their order. The priority determines which pit limit applies when overlaps occur. Higher priority limits take precedence.
-
Click Save
 , then confirm the Status shows Completed for all topographies.
After you save a pit limit, you must select a data source to store the object.
Validate the updated pit limit
After importing a new pit limit, you should confirm that it is correctly positioned and aligned with other spatial elements. You can visualise pit limits in the scene in Client to confirm.
How to validate
-
Visualise in Config or Client
-
Go to Config > Site Management > Visualise the Site. On the ribbon, toggle the display of the object to view it.
-
Open Client and toggle the object's visibility on the the Scene Manager tree.
-
-
Compare the topography against other site elements such as:
-
Verify coordinates.
-
Hover over the object in the 3D scene and check the cursor coordinates in the bottom-right corner.
-
Ensure the values match expected site coordinates.
-
-
Look for misalignment
-
Check that the object aligns with known reference points (e.g., pit limits, points on the topography, survey markers).
-
If the object appears shifted, rotated, or scaled incorrectly, correct it in your CAD or survey software (e.g., Vulcan, Surpac, or MinePlanner’s Spatial Data Manager) and re-import.
-
When multiple pit limits are used, it’s useful to assign each one a different colour – especially when they’re spatially close to each other. You can do this with the pit limit table options.
Troubleshooting
-
Activity area outside pit limit:
If you attempt to create an activity area completely outside all pit limits for its assigned pit, the system will block the action. To resolve this, either move the activity area inside the pit limit or add a new pit limit that includes the intended region.
-
Unexpected reassignment between pits:
This can occur if overlapping pit limits have incorrect priorities. Review and adjust the priority settings to ensure that the correct pit limit takes precedence.
Options
You configure a site’s pit limits using the table options.
|
Option |
Description |
|---|---|
|
|
Appends a row to the table, used for adding a pit limit to the site. |
|
|
Removes the selected table row (pit limit). |
|
|
Saves your changes to the site’s pit limits. |
|
|
Import a pit limit. |
|
|
Selects a level of simplification, which controls the degree of reducing the number of triangles. This option is useful for large spatial data files with an unnecessary amount of detail. Simplified files have a smaller size and can improve processing performance. |
|
|
Defines the colour of the pit limit solid. When multiple pit limits are used, each one should have a distinct colour. In the scene in Client, where the pit limit can be visualised, the software automatically applies a level of transparency so you can still see the objects within the pit limit. |
|
|
Moves the pit limit up or down the list. The order indicates how priorities are applied For more information, refer to Priority above. |